

In this guide, we’ll go through the steps you need to take to allow remote viewing on your Hikvision recorder. Ensure you follow each step carefully and keep a note of various IP addresses etc as you follow the guide.
Hikvision has multiple apps on the App Store & Play Store. The official app is Hik-Connect, but there are other versions such as NVMS7000, LTS Connect, Hi-Look, and Guarding Vision. Hik-Connect is not on Google Play Store, if you are using a Samsung Phone, you can download Hikconnect from the Galaxy Store. For all other Android Phones click here to download Hik-Connect for end users.
Step 1: Connect your DVR/NVR to your router (LAN Network)
Begin by connecting your DVR to a monitor. At this point, you will also need to have connected a network (Ethernet) cable between the DVR/NVR and your internet router.
Log in to your DVR/NVR as the admin.
Open the Main Menu, click the Configuration button, Network, and then General.
Check the box which says DHCP.
Click the Apply button in the bottom right of the screen, now close the menu by right-clicking the mouse.
Wait for 30 seconds, open the Main Menu, click the Configuration button, Network, and then General. Take note of the IP Address. Uncheck DHCP and click Apply.
Click NAT and take note of your server port. Usually, the server port will be 8000. View the image below for reference
To verify your DVR/NVR is connected to your network and has the proper IP Address. On your computer open up your web browser and type the DVR/NVR IP Address.
If you see a login screen, you have successfully confirmed the DVR/NVR is connected to your network. If you do not see a login screen, verify the IP Address and make sure the cable between the DVR/NVR and the router is connected. View the image below for reference
Server Port

Verify Connection

Step 2: Port Forward
Port forwarding is quite simple, but the process is different from router to router. Please follow the steps for your router to port forward. Here's what you need to have to port forward.
The DVR/NVR IP Address
The DVR/NVR Server Port (Usually this is port 8000)
Here are the basic steps to port forward
If you can, name the port forward "Security Cameras"
Under IP address or internal IP address, type in the DVR/NVR IP Address. If you are not able to type in the address there might be a drop-down of all the devices currently on the network. You will have to find the DVR/NVR. Once you select the device the IP address will display.
Depending on your router, the port option will be named differently here are some names you might see. Port Number, Port, Application, Source Port & Destination Port, Internal Port & External Port. No matter what it's called, you will enter the DVR/NVR Sever Port
The protocol will be TCP & UDP
Save the Port Forwarding Rule
Step 3: Check Port
Visit www.canyouseeme.org
Port to Check: Type in the DVR/NVR server port (example: 8000)
If it displays success your port has been forwarded successfully. Please follow the next steps. If you receive an error, please start from the beginning and verify all steps.
Write down the IP address next to "Your IP"


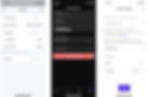
Step 4: Set up the APP
No matter which app you have the setup is the same. Temporarily turn off Wi-Fi from your phone for now.
Click the + to add a device
Select Manual Adding
Select IP/Domain under Register Mode or Adding Type
Under "Alias" Type the location of the security cameras. For Example; Home, Office, Barn, Parking Garage, etc
Address - Enter the "Your IP" IP address you wrote down from canyouseeme.org
Port- Type in the DVR/NVR Server Port. 8000 should be filled in but it can be edited
Username - Type admin
Password - DVR/NVR password
Tap the save icon on the top right-hand corner. It should look like a floppy disk
Tap Start Live View
You will be redirected to Live View to see your cameras.
Things to keep in mind
If you factory reset or replace your router you will have to do this process again.
Your external IP address could change at any time, if this happens you will lose access to your cameras. If you randomly lose access to your cameras verify your external IP address from canyouseeme.org and compare the IP address on your app. If the address is different, click edit and type in the new IP address, and save it